Guidelines for the Use of the
Kodak DC240 Zoom
Digital Camera
- As a minimum, all users must read the Quick Tips pamphlet to learn the
basics for proper use of the camera. Copies of the Quick Tips are available
to all users from the Medical Staff Secretary.

- Users are also strongly advised to read the Kodak DC240 Zoom Digital
Camera User's Guide to be able to make use of all the available functions of
the camera and to get optimum utility from the camera. Users may borrow a
copy of the manual from the Medical Staff Secretary.

- Some Tips on the use of the Kodak DC240 Zoom Digital
Camera.
- URL's for documents available on the Web/Internet..
- Users should also be aware of the Rules
and Regulations pertaining to the use of this camera.
- Get more support here.
Tips on the Use of the Kodak DC240 Zoom Digital Camera
Suggested Uses
Common uses for the digital camera
| Use |
Suggested
Picture
Resolution
 |
Suggested
Picture
Quality
 |
| Presentations: Slides (see below) |
High |
Best |
| Presentations: On-Screen |
Standard |
Better |
| e-mail: Minutest details essential |
High |
Best |
| e-mail: Detail unimportant |
Standard |
Good |
| Web-pages |
Standard |
Better or Good
Depending on use |
Some points to note
- For creation of slides, the digital camera is not the ideal format to use.
A 35-mm camera using normal slide film
- gives much better quality,
- costs less for each slide,
- is easy to develop at any photo shop, and
- the turn-around time is probably mcuh shorter as well.
- As users become familiar with the camera, they should be able to deviate
from the above recommendations to improve their utility of the camera.
- If you need to electronically manipulate the image considerably, it is
probably best to start off with a High resolution picture at the Best
quality setting to compensate for the inevitable loss of quality of the
image that occurs with the editing.
Before Starting on Your Photography Session
In case the previous user has left some files in the camera memory pack, please delete
all image files from the camera memory pack so that you will have full use
of the space available in the memory pack. Also, this will make sure that you do
not mix-up your photographs with the photographs by the previous user.
Close-Ups 
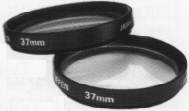
If you need to focus closer than the normal minimum distance of 0.5 m (20
inches), users should note that there is a close-up mode allowing users to focus
from 0.25 m to 0.50 m (10 inches to 20 inches). Unfortunately, a true macro mode
is not available but if a sufficient number of members ask for this, we may
consider getting a close-up lens  to allow even closer focusing.
Uploading the Images from the Camera to the Computer

Users have several choices when uploading their images to the computer.
- Methods of uploading.
- The easiest is to pass the camera to the Medical Staff Secretary and to
tell her which format you prefer and to let her do
the hard work.
- If you prefer, you may upload the images on your own. Users may do this
either using
- The new Dell computer, currently placed in the medical staff library,
to download the files from the
camera or
- Their own home computer or notebook.
This latter technique is only recommended for the inveterate masochist.
- Formats available
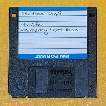
- Floppy disk.
Users will have to provide their own floppy disks.
- Zip disks.
 This
is much more practical than floppies as the 100 MB capacity means that 1 Zip
disk is almost always sufficient while, multiple floppies will be needed to
store all the images from a full 8 MB CompactFlash Memory Card.
Again, users will have to provide their own Zip disks.
- On hard-disk in computer.
 If you
stroe your images on the Medical Staff computer, please ensure that you
- Create a sub-folder under the C:\My Documents folder using your own
name e.g.C:\My Documents\NgunKW, and store all your personal files in
your own sub-folder.
- Transfer the images to your own computer when practical and delete
them from the Medical Staff computer.
- For now, each staff may store up to 50 MB of files on the Medical
Staff computer. If there is insufficient space on the hard-disk, any
files above the 50 MB limit will be deleted without warning. Also, any
image files older than 1 month may also deleted even if the 50 MB limit
is not exceeded. The hard-disk space available to each member will be
reviewed as the need arises to ensure that everyone has an opportunity
to use the computer. Members are asked to cooperate by transferring
their files to their own computer at the earliest opportunity to reduce
the demands on the Medical Staff Computer.
Optimal Use of Batteries Provided 
Members may use either their own AA batteries (alkaline, Ni-Cad or Ni-MH) or the
Ni-MH batteries that were supplied with the camera. While the Ni-MH batteries
are less prone to the memory effect than are Ni-Cad battries, they are not
completely immune to the effect. Therefore, members should, whenever possible,
use the batteries until they are completely flat before recharging them.
Viewing the Images Dowloaded into the Computer
While users may use any image editing program to
view and edit the image files, if you only want to look at the images but not
edit them, the most convenient method is to use an image
viewer or browser (not a web browser).
Photo/Image Editing Software
There are 3 photo editing programs available on the Dell Computer. They are
- Adobe PhotoDeluxe Business Edition 1.0 which was bundled with the Kodak
camera and which has been installed into the Medical Staff computer. Members
are free to edit their images using this program.
- Microsoft Photo Editor which is part of Microsoft Office Small Business
Edition, and
- Kodak Picture Easy 3.1.
The first two are reasonably powerful programs and should satisfy the needs of
most users. However, the Kodak Picture Easy program while simple to use is very
slow and severely crippled in the features department and should in all
probability be passed over. A copy of the Kodak Picture Easy Software User's
Guide is also available from the Medical Staff Secretary for loan to
members. 
Some points to consider,
- Remember that the images are stored in JPEG format which is a "lossy"
compression technique. Therefore, each time the images are saved, there will
be a drop in quality of the image. This is true even if you save the file in
the highest quality setting available.
- If you expect to edit the image, start with the best image possible by
capturing the photo using High resolution and Best quality setting.
- Always make a duplicate of the original image and edit only the copy. If
you make a mistake or need to make another image based on the same image,
make another copy of the original and work on the new copy. If you are prone
to make boo-boos, consider setting the original image file to read-only
status to prevent any possibility of corrupting the original image file.
- Try to minimise the manipulation of the images to reduce the loss in image
quality.
- Do not save the image until you are completely satisfied with the
image. If you repeatedly save the image to reduce the chance of losing the
image, remember that each time you save in JPEG format, you will be
conitinuing your work on an image with a reduced quality. The loss in
quality is cumulative.
Image Browser or Viewer
If all you want to do is to have a quick look at the images you have taken, then
what you need is a browser. It this case, may I suggest the freeware IrfanView
which I have downloaded into the Medical Staff computer. Use File, Open
to open the image or photo of your choice. After that, to view other images in
the same folder, use the space-bar and the backspace keys to view the next or
the previous image respectively. If you need to view an image from another
directory or you know the file name of the image your are interested in, use File,
Open again. To use the other functions available in this wonderful program,
just "fool around" with the program to try out the various functions.
There isn't an on-line help but none is really needed.
Making Use of Your Digital Photographs
Now that you are in proud possession of several digital photographs, what do you
do with it? I certainly hope you thought about this before taking the
photographs. Anyway, here are some of the things that are commonly done with the
digital photographs.
- Presentations
 You
can create slides with presentation software or, as is becoming more and more
common nowadays, you can run your presentation straight off a desktoop or
notebook computer. The latter option is much better as it means you can make
changes to your presentation right up to the last minute, jazz up the
presentation by using interesting transition effects between slides and even
animate images or add audio effects. In other words, you'll be creating your
very own multimedia presentation.
Unfortunately, at present, there is no presentation software on the Dell
Computer and you'll have to either use Freelance Graphics on the HP Vectra
computer in the Medical Staff Conference Room or Internet Room as we call it,
or else your own presentation software in your own computer. However, we are
in the process of acquiring suitable software for the Dell computer.
- Publishing
If you want to create some small booklets, handouts or other simple documents,
you can do so right on the computer. Microsoft Publisher is available on the
Dell computer and you are free to use it to create any publications you like.
However, if you need colour you'll have to print it out elsewhere. Members are
also requested to be reasonable in their usage of the laser printer as the
toner is fairly expensive at about $300 a pop.
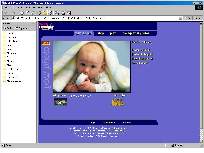
- Web-Publishing
 This
is another great use for digital photographs. You can use either Microsoft
FrontPage Express (FPXpress) or Adobe PageMill 3.0 on the Dell computer.
FPXpress is the "lite" version of FrontPage and may not meet the
needs of the power user who should probably stick with PageMill.
Don't forget, all the main Microsoft Office applications are also
web-aware. They can be used to create and edit web-pages using HTML. Just open
the document you want to edit or open a new document and edit it as normal.
When you want to save the file, just make sure that the document is saved in
HTML format. To do that, choose File, Save As and in the Save as
type drop-down box, select HTML Document.
- e-mail
 If you need
to get a picture over to a colleague in United Kingdom to get his opinion,
just take a digital photograph and send it as an attachment by e-mail. To
reduce file size, capture the image at Standard Resolution at Good Quality but
if the best picture quality is needed, then use High Resolution at Best
Quality. Almost any recent e-mail program will handle attachments, including
Microsoft Outlook or Outlook Express available on the Dell computer.
Documents Available on the Web
If you would like to view this document when you are unable to access the
Medical Staff Dell computer, an online version of this document is available at
https://drsjmc.tripod.com/kodak-dc240_gdln.htm
The Rules and Regulations are also available at,
https://drsjmc.tripod.com/kodak-dc240_rl-rg.htm
Support
Members may get support from  via,
via,
- Their web-site at
http://www.kodak.com
(click on Service and Support, or something similar)
- Free Technical Suport line at
| |
Number |
| Free Technical Support (Malaysia) |
60-3-7957 2722 |
| Free Technical Support (Australia) |
1-800-803 300 |
| Fax |
60-3-7955 5919 |
If members are really at a loss and can't get the answers from either the
manuals or the Kodak support links, you may try to contact me (Dr. Ngun Kok
Wah). I'll try my best but results are far from guaranteed and if you do get any
results, a free lunch goes without saying. Sorry, I just said it, didn't I? If
it's really, really urgent (do I hear a free dinner as well?), you can contact
me at home or through my mobile phone (get the numbers from the hospital
operator). A much slower reply can be expected if you e-mail me at  But at least, you won't get a grouchy reply and dinner is not expected.
https://drsjmc.tripod.com/index.htm
Created:- 07 July 1999
Last Updated:- 29 May 2000
Author:- nkw


 to allow even closer focusing.
 This
is much more practical than floppies as the 100 MB capacity means that 1 Zip
disk is almost always sufficient while, multiple floppies will be needed to
store all the images from a full 8 MB CompactFlash Memory Card.
 If you
stroe your images on the Medical Staff computer, please ensure that you


 You
can create slides with presentation software or, as is becoming more and more
common nowadays, you can run your presentation straight off a desktoop or
notebook computer. The latter option is much better as it means you can make
changes to your presentation right up to the last minute, jazz up the
presentation by using interesting transition effects between slides and even
animate images or add audio effects. In other words, you'll be creating your
very own multimedia presentation.
 This
is another great use for digital photographs. You can use either Microsoft
FrontPage Express (FPXpress) or Adobe PageMill 3.0 on the Dell computer.
FPXpress is the "lite" version of FrontPage and may not meet the
needs of the power user who should probably stick with PageMill.